Quick Start: OneDrive
SummarySummary
Microsoft OneDrive is a cloud-based data management solution that allows district employees the ability to store, share, and access files across multiple devices and platforms. Using a cloud based file storage solution offers staff the greatest level of protection during hardware replacement or failure, and the greatest flexibility of access and collaboration.
Steps
First-Time Use on a Windows Computer
After logging into any district Windows computer for the first time, OneDrive will automatically log in and begin to sync files. This will make files already saved in OneDrive available on the newly logged in computer.
- Log into the district computer with district credentials.
- When logging in for the first time, several processes will begin automatically, including signing into OneDrive and initiating a file sync.
- If for any reason this automatic log in does not happen, see Signing into OneDrive Manually - Windows
- After the OneDrive file sync has completed, a notification will appear in the bottom right corner of the screen (as shown below).

- Restart the computer and log in.
- File explorer will now display [NAME] - Salem Keizer Public Schools near the top of the list in the left pane.

First-Time Use on a MacBook
- Log into the district MacBook with district credentials.
- Open Launchpad (by default, located on the left side of the dock)
- Find and select OneDrive from the launchpad window
- Depending on what apps are installed, this could be several pages in on Launchpad
- In the 'Set Up OneDrive' window, enter district e-mail address and follow the on screen prompts
- Select Work or school account
- Enter district password
- Read and click next through several tutorial screens
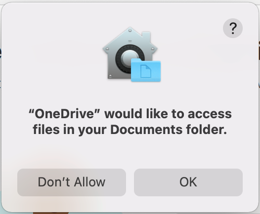
- Select OK to allow "OneDrive" to access files in the Documents folder.
Files are now accessible on the computer from the finder window using the OneDrive location.
Preparing for a new computer / Moving files to OneDrive
Only files saved to OneDrive will sync across devices automatically, and the files will are also accessible from any device that has an internet connection. There are multiple ways to move files from a computer to OneDrive, one easy way is outlined below:
- Open two File Explorer windows (on Windows) or two Finder windows (on Mac)
- [Windows] Press Windows key + E to open File Explorer
- [MacOS] Press Option + Command + Space to open Finder on MacOS
- Positioning the windows side-by-side so both can be completely seen will make later steps easier.
- In the left window, open the location of the files wanted to copy to OneDrive.
- Common locations to copy files from:
- Desktop
- Documents
- Downloads
- Favorites
- Links
- Music
- Pictures
- Videos
- In the right window, open '[NAME] – Salem Keizer Public Schools'. This option will be listed in the left part of the explorer/finder window.

- From the window with the non-OneDrive files, select all folders.
- [Windows] Click on one folder and then use Ctrl + A, to select all folders at once
- [MacOS] Click on one folder and then use Command + A, to select all folders at once
- Use Ctrl + C / Command + C to Copy selected files/folders
- Click in the OneDrive window once, then use Ctrl + V / Command + V to paste copied files.
- Paste in an empty area so the files don’t paste into a folder
- If files already exist in OneDrive, there may be a prompt to merge, replace, or not copy files
- Repeat this process for other file locations needing to be saved to OneDrive
Accessing OneDrive Files Online
Files stored in OneDrive can be accessed from any device connected to the internet. [Note: the device must have appropriate software to open the file.]
- From a web browser, navigate to https://onedrive.live.com/about/en-us/signin/
- Enter district e-mail address in the Sign in dialog and select Next
- Select Work or school account
- Enter district User name and Password then select OK
Additional Help